Experiments with Gel Press

Hello everyone,

Today we’re here at the Rainbow Craftykari blog with an interesting post for you. Its an information packed post, with a lot of play and examples.

We’ve heard a lot about Gel press, and seen videos, but our very first interaction was during Creativation 2017. We took up a class, saw demos and were fascinated with the power of this one tool.

Gel Press® is the original, superior monoprinting plate – permanent and reusable! Make stunning prints for use in your artwork: Mixed Media, Scrapbooks, Cards, Art Journaling, Home Décor and more! – https://gelpress.com/

As they suggested, gel press aids in making stunning prints to be used in any kind of project. Many of you might say, its the same, paint your background, stencil, stamp, etc. Well yes, but using this plate, life is so simple, you get faster prints, it’s addictive so you keep going on and on. You can create intricate prints, with multiple patterns.

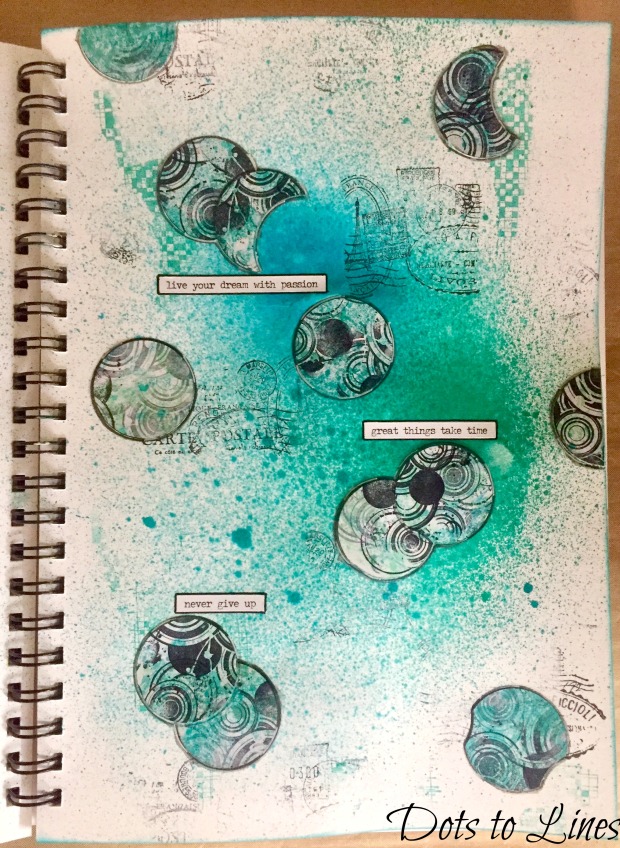
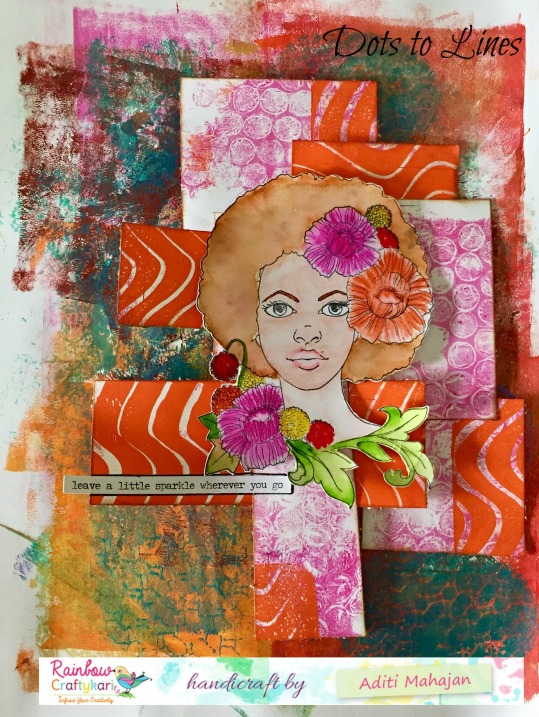
Here is a journal page we made using gel press prints.
Journal page fin.jpg

This plate is a silicon transparent jelly like plate.

Gel-Press-8x10-Plate-open-package

These come in varied sizes and shapes:

12″x12″, 12″x14″, 8″x10″, 5″x7″, 6″x6″, 3″x5″, 8″ round, 6″ round, Petites Set- Oval, hexagon, rectangle, triangle, square and circle (small).

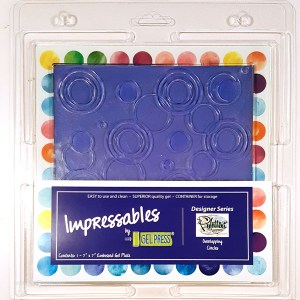
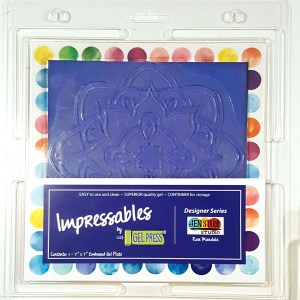
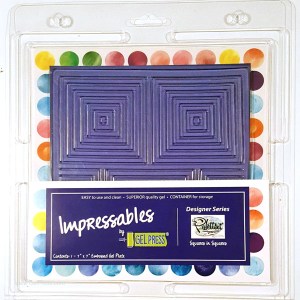
The latest products are the Impressables. These come with certain patterns in the plate, so your first print has a self pattern.
impressable 2impressable 3impressable 4impressable1


This is the basic information. Now lets play with them and show you some results.

Firstly, always keep the plate on a craft mat or acrylic mat. Since it has baby oil any other surface will absorb it. The smaller ones can be used by removing only one acrylic sheet and leaving the other mounted. In between, if you want to clean your plate, use a baby wipe. You can work with acrylic paints, most brands work. And if  the paint dries up quickly you could use a retarder or acrylic glaze medium on your paint. We have tried working with inks and we got great results with distress inks and oxides.

1. Add some paint on the plate, spread it with the brayer. Use bubble wrap and press onto the paint and lift it. Keep a sheet of paper and rub on the back to lift the print on the side touching the plate.

1234

2. Add a different colour on the plate and spread with the brayer. Using any texture comb, create a design and lift on your paper. On the left base, create some circles with a bottle cap and a contrasting colour and lift the print.

5678

3. On a cleat plate, place the stencil and through the stencil add two colours and spread with the brayer. Lift the stencil and take a print on the paper from the plate. You could also take a print from the paint on the stencil by rubbing it on the sheet.

91011

4. Add two colour onto the plate and spread with the brayer. Place a stencil on the plate. Press a paper and lift the print. This will give you the print only through the stencil. Next take a print from the stencil. And third, press the paper onto the plate again once the stencil is lifted- this will give you a ghost print.

121314

15

5. We kept a plain sheet of paper next to us, and every time we used the brayer, we moved it on this sheet to clean the brayer before moving onto another colour. This gave us a great background, which we used for our journal page above. We had some prints to it with the small oval plate and stencil for more interest.  We cuts pieces from sheets show in technique 1 and 2 for our layers.

17

6. Some play with oxides. We used the mini rectangle and hexagon plate. Added one colour of the oxide onto the plate directly from the ink pad. Next, we rubbed a darker colour onto the uprooted side of and embossing folder and pressed it on the plate. We then took a print onto our paper. We stamped from the folder directly on the paper, to take a print from the remaining ink as well.  In the last hexagon, after taking a print, we stamped another shaded using acrylic stamps and printed it over the first hexagon print for more interest. In the same way, you could add colour and stamp on the plate and take a print for a different background.
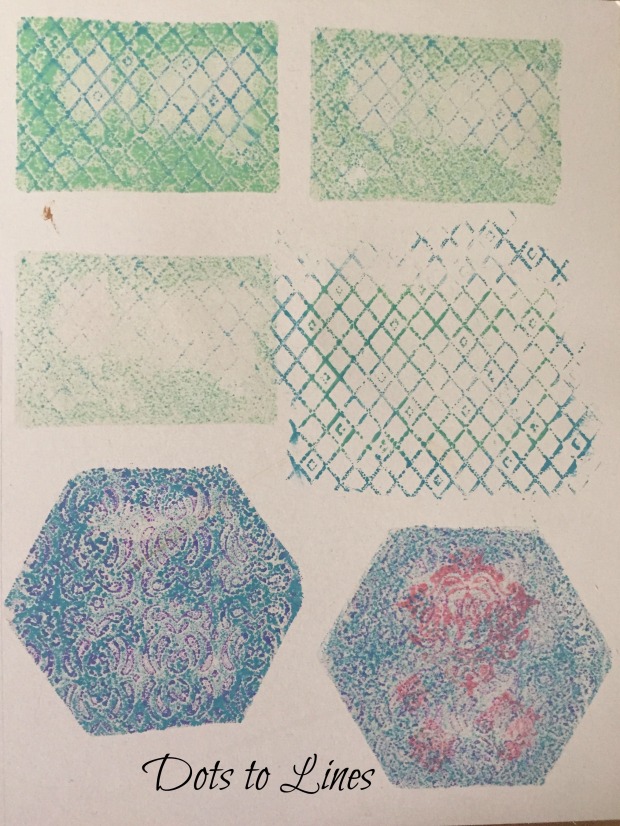
16

As you see above, stencils, stamps and found object work really well. Anything to create texture and patterns as with the plate all you’re doing is lifting prints and getting some fabulous paper ready for your projects. Not just paper, your could print on fabric and other surfaces as well. We’ve only introduced this tool and there are many more techniques to explore.

We hope we’ve inspired you to play and explore :)!


Regards,

Sunila & Aditi


Distress Products-Inks

Today we are touching a very interesting topic in this post- distress products and mainly distress inks by Tim Holtz, manufactured by Ranger Ink.

These are the most sought after products in the mixed media and crafting world. People use them for different purposes, however, we still think there is a lot to explore.

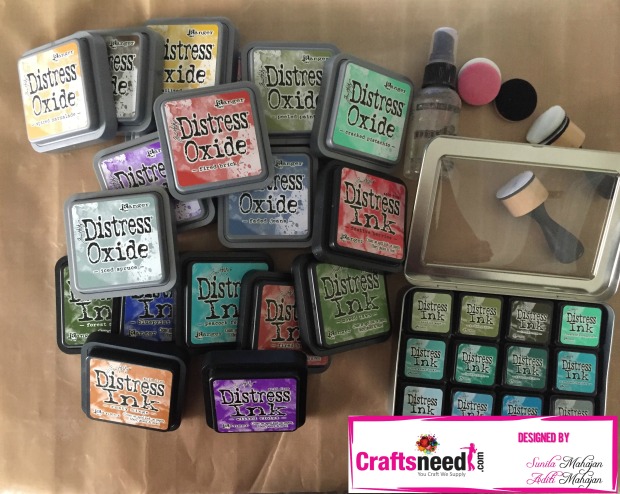
Distress inks come in two sizes the standard 2″ ink pads and the minis 1″ ink pads. They come in  60 colours both standard and minis. In the standard ink pads there is an addition of one more- Picket Fence (white). These are acid free, water based dye inks- and thats the best part. One can play with them, move them and have fun by just adding water.

These inks are great for backgrounds, stamping, stenciling, embossing, colouring & shading. They work well with the other products in the distress range like paints, sprays, crayons, markers, etc.

The latest product released are the distress oxides. These are water based dye and pigment fusion inks. When sprayed with water they create an oxidised effect. They can be used in the same way as the distress inks.

main image


We’ll take you through few of the different techniques with both these inks with examples.

  1. Backgrounds- Like we said before these are great to create backgrounds. Rub the ink pad onto your craft mat, add two – three colours and spritz water. Lift the colour on your work surface (paper/tag, etc..)  by swirling it on the craft mat. Dry with the heat tool after each lift to set the colour and continue lifting colour. You can go on and stop once you’re happy. In between spritz water as that creates some marvellous effects especially where two colours blend.
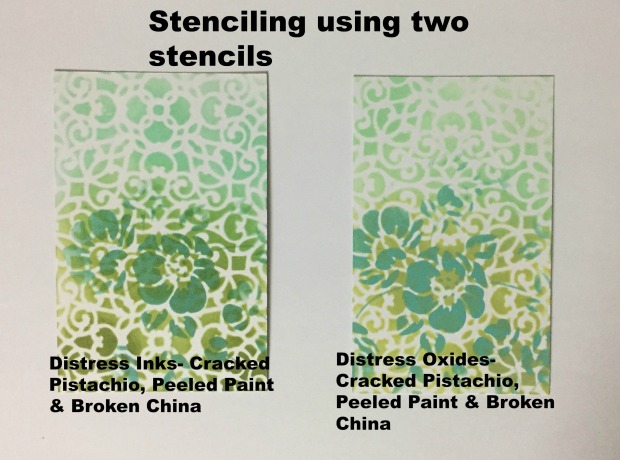
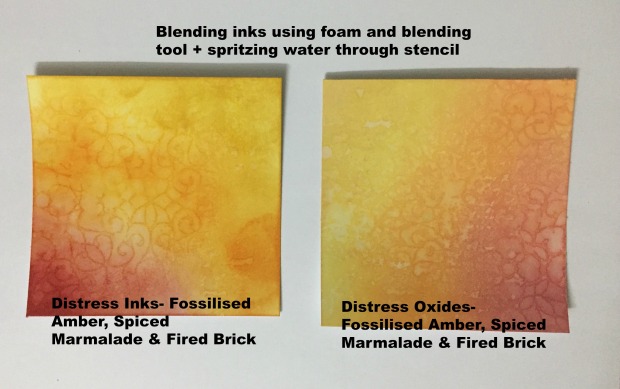
  2. Stenciling – Use a stencil and go over it with ink on the blending tool with foam.  Go in a circular motion. You can cover the surface or stencil randomly. You can use two- three different stencils on one surface. These create great backgrounds as well as ready projects. Another great effect can be achieved by spritzing water through a stencil on an inked background. technique8
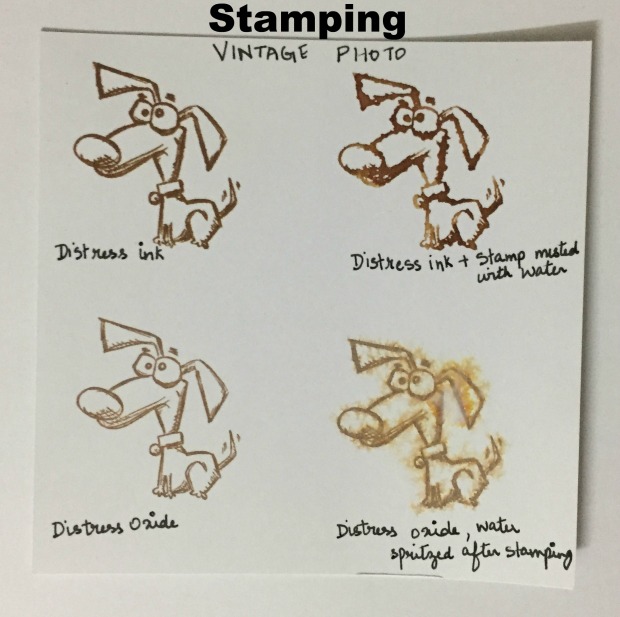
  3. Stamping- Yes, distress inks are great for stamping. You can use them with clear acrylic as well as rubber stamps. They take time to dry, so don’t touch them immediately as you might end up smudging the ink. These are water based inks remember? So when stamping, mist the ink on the stamp with water slightly to achieve a water-colour effect. You could mist the stamp with water (without any ink) and stamp it on an inked background. This lifts the colour, with the stamp design appearing.technique11
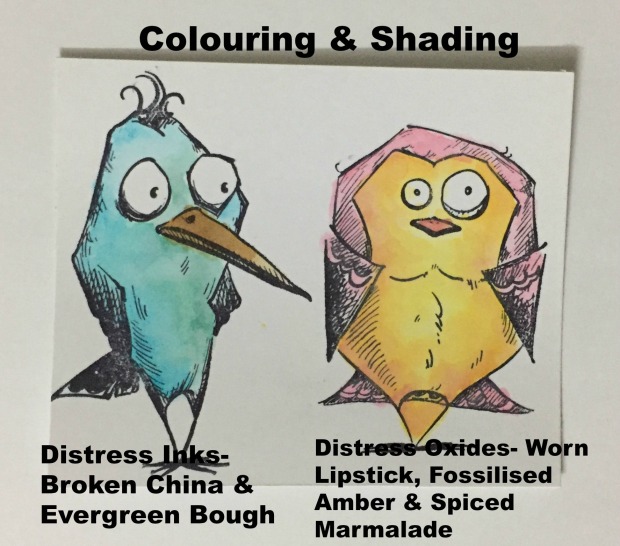
  4. Colouring/Shading- These are great for water-colouring your stamped images as well. Simply use a water brush and the ink. You can use it from the pad directly, for rub some onto an acrylic block/craft mat and use. technique10
  5. Blending- Both distress ink and oxides are great for blending colours. Oxides however blend better than the inks. When working with different shades of one colour, a great ombre can be achieved by blending colours. Apart from that you can create more shades, by mixing colours like paints. technique 7
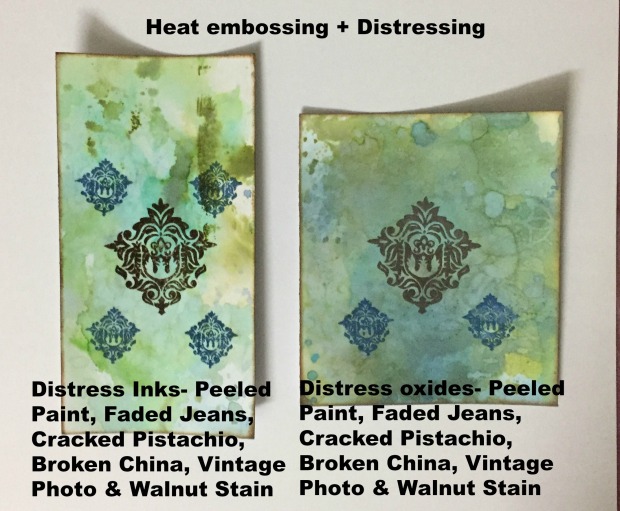
  6. Distressing- As the name suggests, the inks are great for distressing the surface especially paper to achieve a grungy, vintage or shabby-chic look. This is best achieved with the brown tones for the distress inks. The brown tones form the oxides give a great oxidised/rusty look.
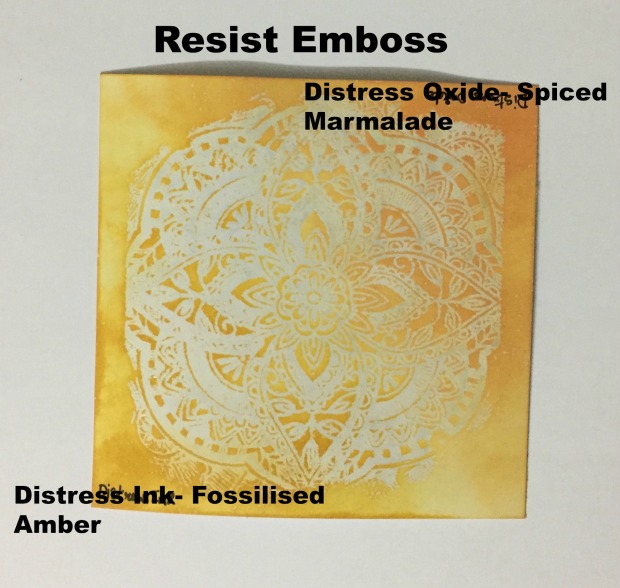
  7. Embossing- Since these inks take time to dry, you can use them for heat embossing. Stamp an image, sprinkle some embossing powder and heat set it. You can also use it for the resist- emboss technique. Stamp and image using versamark and heat emboss it using clear embossing powder. Rub ink using the blending tool, and the emboss magically appears as it resists the inks.technique9technique 5

The other distress products are also as versatile as the inks and can be manipulated with water. They are great to use with each other to create final projects.

Here are some finished projects using the above techniques:love-tag-fin

technique 3

technique 4

cherry blossom.jpg

In this post we’ve shared a few of the techniques, and there is still a wide ocean to explore. Hope this  was informative and has you ready to play with your inks.


Little Miss Muffet

Today we are at the Through The Craftroom Door blog, with another card using a digital image. Our sponsor this week is Little Miss Muffet and she is offering $6 voucher to use in her shop.

Here’s what they have to say about their brand:

Hi everyone, I am Barbara Sproatmeyer, aka ForgottenScraps, and I am the owner of Little Miss Muffet Stamps. I love coloring and I love stamping! However, I think the best part about this is I get to share it with my own Little Miss Muffets who love to work by my side. Their personalities and adventures come out in the stamps that I draw, whether it is the day we roasted smores for the first time or when they discovered how high they could bounce on their hip-hop balls. They continue to be a source of amusement and inspiration. LOL

Little Miss Muffet Stamps began in January 2011 and I’d like to give a shout-out to my family and friends for their encouragement and support – thank you! I am also very fortunate to have a fabulous design team and I’m reminded of their talent every week when they show off their awesome creations. For oodles of inspiration, make sure to see what they’ve created over in the LMMS Gallery or LMMS Challenge blog for lots of creative ideas.

Little Miss Muffet Stamp products are created by myself and other talented artists including Bugaboo and Pollycraft. (For more fabulous images available in digital form, you can check out their sites.) I also stock a variety of other brands and products that offers you more of a selection and increases your buying experience, such as products from Raley’s Confectionary, C.C. Designs, Make it Crafty and Whimsy Stamp.


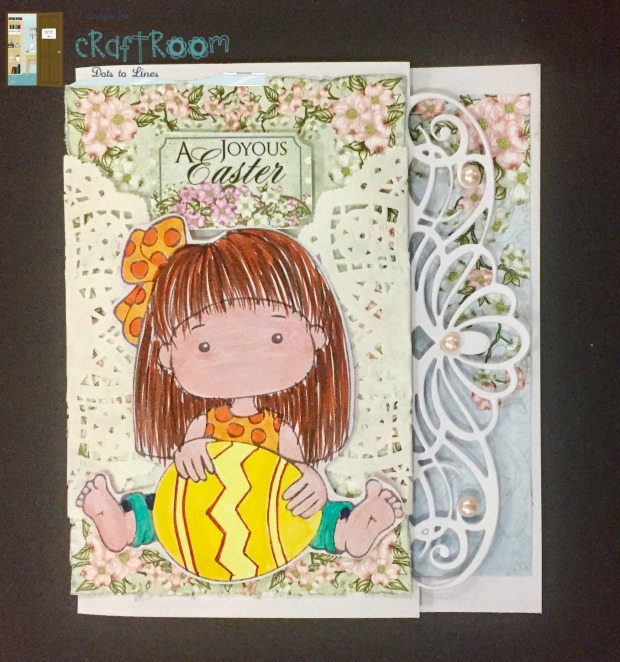
We’ve used the Polka dot pals Neomie Easter image for our card today.

March easter

Hop on to the blog and check the ongoing challenge here.

Letters from Home

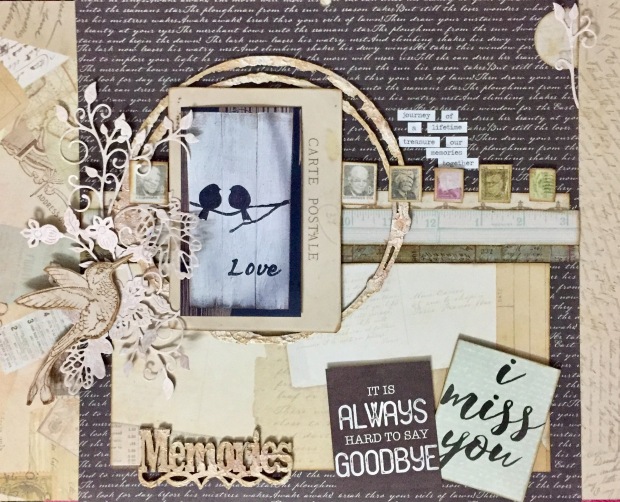
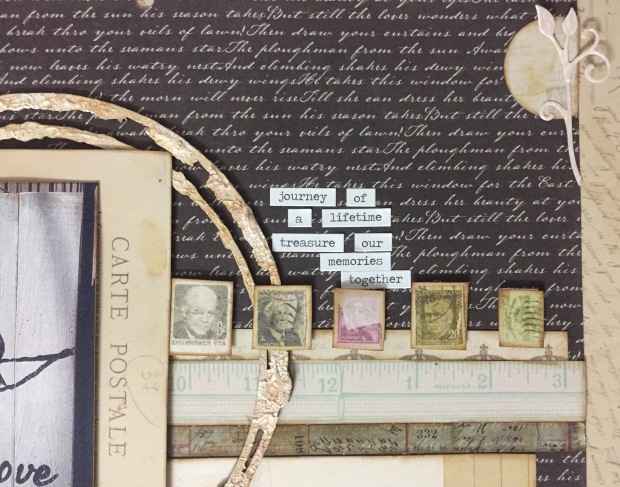
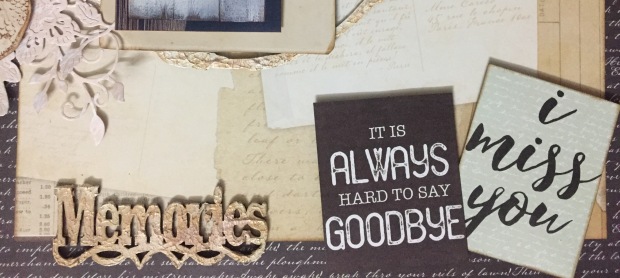
Today, we’ve created a layout using the DCWV sketch of the month and Letters from Home Paper Stack. This paper stack is so powerful, that it takes you down memory lane.

We’ve created a layout, treasuring memories of a loved one. Gone is the era where people wrote and posted letters to each other, and then saved and treasured them in trunks and sacks. Today, we’ve revisited memories of a loved one no more, through letters they wrote and left behind.

Hope we touch your hearts with this one, and make you wanna write or pull out those old letters and revisit them.

DCWV March Close up2DCWV March Letters from HomeDCWV March close up1DCWV March close up 3

Here’s the sketch we used:

dcwv march 17'

Cherry Blossom

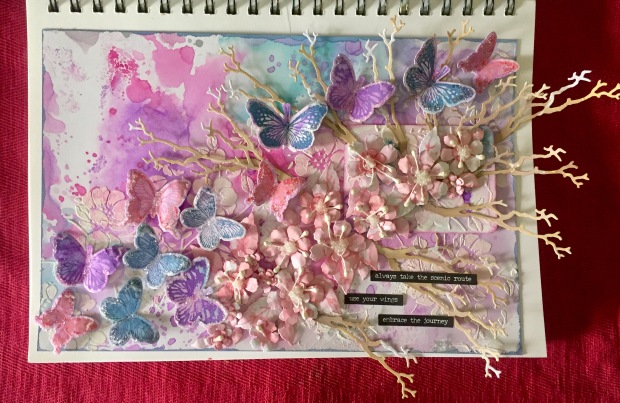
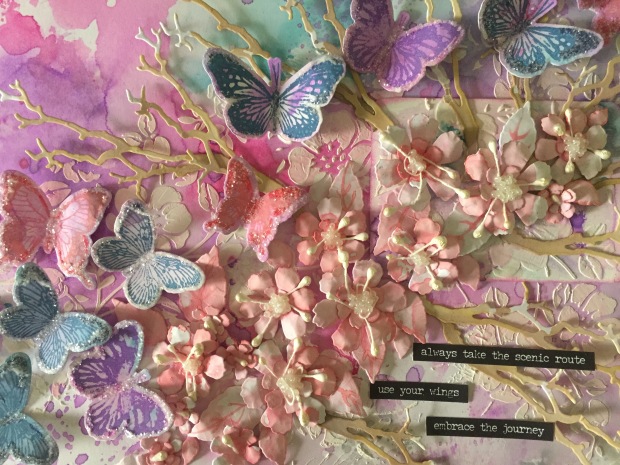
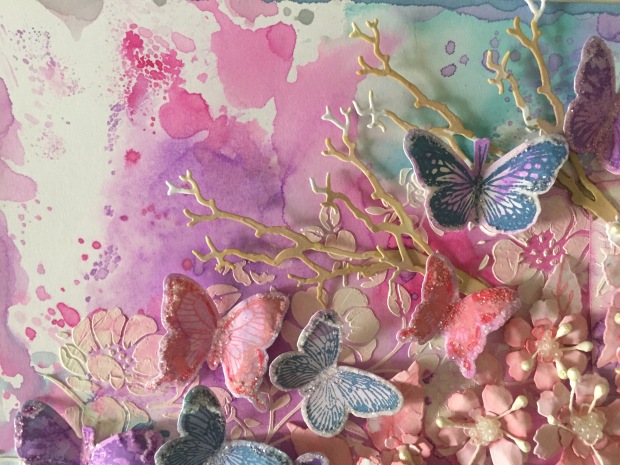
Spring which means flowers, butterflies, freshness and amazing colours. Today we played with our distress oxides and created a journal page. We used the oxides to create our background, stamp the images and colour the flowers and leaves.

We’ve created a cherry blossom which is such a beautiful sight to witness.

We were inspired by the More than words March Challenge – Beautiful and Butterfly; Rubber Dance Theme Challenge– Spring;  Creative Embellishments March Challenge– Inspired by the colours.

FullSizeRender 80

FullSizeRender 85FullSizeRender 87FullSizeRender 88

Supplies used:

Distress oxides- Worn Lipstick, Faded Jeans, Broken China, Wilted Violet, Iced Spruce

Distress ink- Picked Raspberry

Tim Holtz Floral Stencil

Modelling Paste

Kaisercraft Butterflies stamp and die cut

Sizzix Tim Holtz Thinlits Small Tattered Florals

White pollens and micro beads

Tim Holtz Ideology Small talk


This project was submitted for:

More than words March Challenge

MTW March

Rubber Dance Theme Challenge

RDMarchThemeCh

Creative Embellishments March Challenge

purple_unicorn_painting_fantasy_abstract_hd-wallpaper-663898


Mixed Media Box

Good morning everyone,

We’re at the Mixed Media Mojo Blog  and today we have a fun tutorial on a mixed media trinket box for you’ll. Everyone needs a box to store their trinkets, tit-bits, etc.. This also makes a great gift.

Lets begin..

Supplies used:

  • MDF Box
  • White Gesso (any brand)
  • Mod Podge
  • New paper
  • Gauge/cheese cloth
  • Paint brush
  • Palette knife
  • Stencil – Tim Holtz Scribbles
  • Art Basics White Crackle texture paste (can also use modeling paste)
  • Liquitex glass beads texture (can substitute with sand texture, grit paste, mix any beads in gesso)
  • Dylusions Sprays- Campso Teal, Cut Grass, London Blue, Polished Jade (Can use acrylic paints or any other sprays)
  • Mont Marte Acrylic Paint- cerulean blue (can use any brand or chalk paints as well)
  • Inka gold Old Silver or any other wax based paint to highlight the texture.
  • Embellishments of your choice

Step 1:

Apply a layer of mod podge on the lid and four sides of the box. This layer needn’t be thick and go side by side, sticking randomly torn pieces of newspaper. You can over lap them.

Step 2: Cut pieces of gauze/cheesecloth and stick it randomly creasing it on all sides over the paper using a little mod podge.

Step 3: Cover all sides with gesso. This will also help stick the gauge pieces and prime our surface for further texture.

Step 4: Some more texture. Using a stencil and crackle paste go over all the sides. Here we went over the complete surface, you could also do it at random places. Since we used crackle paste, its important to let it air dry a bit before using the dryer. This gives us great cracks.

Step 5: Using the glass beads texture go over the surface randomly with your finger and dry it. This add more interest to the existing textures. You could use sand texture, grit paste, or mix beads in gesso.

Step 6: Once dry, we are ready to play with our colours. Like mentioned above, here we used the dylusions sprays, however you could also use acrylics paints and spritz them with water to blend.

Step 7: Paint inside and the bottom of the box and the back of the lid with an acrylic paint. Go over with inka gold on the glass beads texture, the cracks and the gauge to highlight the texture.

Step 8: Add your embellishments and the box is ready!

 Hope you enjoyed this tutorial!

We are having a fun challenge this month, do check it out and participate:)!

We also have a video tutorial for this project coming out this Saturday:)!  Subscribe to our youtube channel:

Hello everyone! We are so excited to begin our term with Crafts Need as Design Team Members.

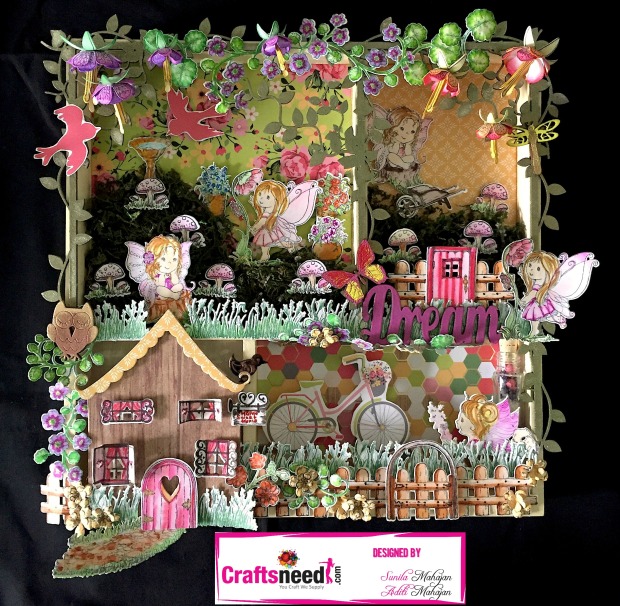
Today we are sharing a tutorial on a shadow box project. We’ve made it girly, dreamy and magical.

A shadow box is a craft device akin to a “deep frame” that is used for displaying three dimensional images or items. The craft probably originated centuries ago, whenever leisure time allowed for the assemblage of mementos. It was also used for sailors and army personnel to display their badges, medals and other service reminders. The beauty of using a shadow box to display items is that it looks neat and finished when hung on a wall or placed on a shelf.

Here is the final project and below is a step by step tutorial.

shadow-box-main-image

fullsizerender-88

We ended up not using the resin frames and lace shown in the picture above as we began assembling our elements.

Here is the product list for your reference:

  • MDF shadow box
  • DCWV Hello Darlin Paper Stack
  • Mod Podge Matte
  • Paint brush
  • Off white/cream acrylic paint or chalk paint (any brand)
  • Paper trimmer
  • Scissors
  • Ruler
  • Pencil
  • Medium size glass bottles
  • Beads/sequins
  • Moss
  • Dusty Attic Chipboard (or any other brand)
  • Heartfelt Creations- Wildwood Cottage collection stamps and dies
  • Heartfelt Creations Cascading Fuchsia stamp and die
  • Die Cutting Machine -Sizzix Big Shot
  • Archival Inks- Jet Black, Library Green and Vermillion
  • Zig Clean Color Brush Pens
  • Versa Mark
  • Embossing powders- Lindy’s Spanish Moss Green & Weeping Willow Green Gold; Ranger’s Black, Red Geranium, Yellow, Magenta, Gold & Copper
  • Heat Tool
  • Flower shaping tools
  • Adhesive- Tacky Glue
  • Foam tape
  • Ivory sheet/cardstock/any paper for stamping, colouring and die cutting
  • We ended up not using the resin frames and lace shown in the picture above as we began assembling our elements.

To begin, paint the shadow box. Since we want to use pattern paper for the inside of each compartment, paint only the sides, rim and back. (since we were in the stage of figuring out, we painted inside the box square compartment, but that is not required) Off white or cream colour isn’t readily available , so mix white, a dash of lemon yellow and a dash of birth sienna.

fullsizerender-86

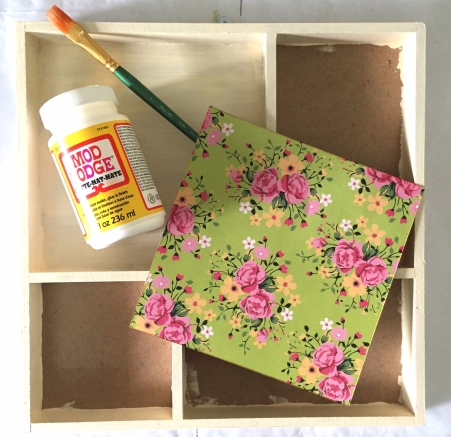
Next, measure the compartments, choose pattern paper from the stack and cut to fit. This will be adhered using mod podge.

img_0924

Spread mod podge with a brush and starting from one side stick the paper, pressing evenly as you go to the other side. Do not lay the paper in completely, as this will lead to bubbles. You could use a scrapper tool /or a used credit/debit/store card to run over the paper as you lay it from one end to another. We covered three compartments with paper and decided to paint inside the smallest square compartment. 

Once our base is ready, lets begin with our elements.

Fussy cut some elements from the paper stack itself- cycle and birds.

Next, stamp images from the wildwood cottage collection using archival inks. We stamped multiples, as we weren’t sure how many will be used. We then coloured are images with zig markers. You could colour them with any medium you are comfortable with- colour pencils, inks, watercolours, etc. Using our sizzix big shot and the coordinated die, we die cut these stamped images.  

The main house image, has been die cut using paper from the stack.

As you’ve read above, a shadow box is all about the theme and elements. Hence, once you’ve decided your theme and gotten ready with all your elements, its all about, playing, arranging, layering, assembling and bringing everything together.

Here we will take you through our process. We started with the bottom of the shadow box.

We assembled the house first. Used foam tape to adhere windows, roof, door onto the base of the house. Next we built our scene. Used the fence, the gate , grass, cycle and a girl and assembled them all onto our shadow box. We used tacky glue to adhere them in.

img_0938

We picked out some chipboard and pdf elements to go with our theme and arranged them around to see if they look good. 

img_0946

Once we were happy, we decided to colour our elements. The easiest way was to heat emboss them. So we first ran versa mark over them, poured the embossing powder and heat set them.


Next we arranged all the elements together- the moss, the wildwood cottage elements and the chipboard elements. While arranging, our key factor was perspective, some things front, some back, giving an illusion of space. We stuck some with glue and some with foam tape. We also shaped flowers for this project. However, ready flowers can be used to.

Below are some close ups of our project.    

fullsizerender-60

fullsizerender-76

fullsizerender-73

Hope you enjoyed this project!

Sunila & Aditi
Birthday Chicks

Today we are at the Through The Craftroom Door blog, with another card using a digital image. Our sponsor this week is Pickled Potpourri.

Pickled Potpourri Designs offers high-quality digital stamps, downloads and printables. Featuring old favorites from The Angel Company (TAC), as well as new, original designs, you’ll find a potpourri of images in a wide range of styles to enhance your papercrafting, scrapbooking and other artsy projects at Pickled Potpourri!

pickled

Here is our flip style card:

Journal page

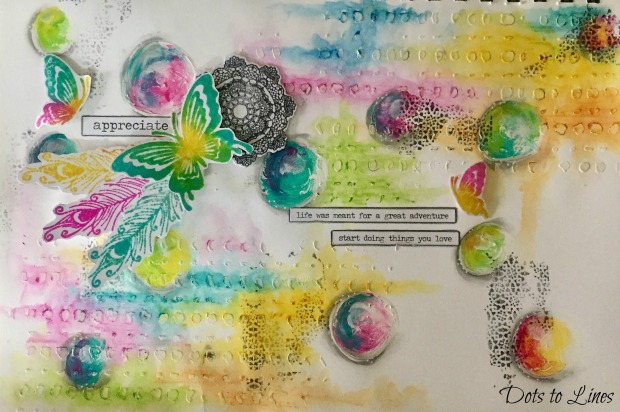
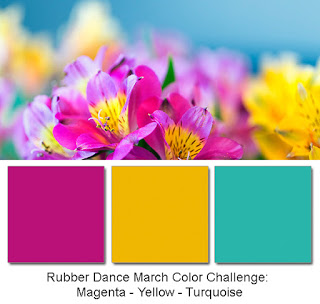
We were so thrilled with the colour inspiration on Rubber Dance Blog and created a journal page. They speak of spring and gave us instant joy.

We’ve used texture paste, distress crayons and stamping fro our background. The circles are made with gesso and coloured with acrylic paints. Our focal elements have been stamped using distress inks.

rubber-dance-march


Here’s the board:

rdmar2017ch

March Challenge

March 1st, which means new month, new challenge. Well today we are at the Rainbow Craftykari Blog, hosting the March Challenge.

The challenge this month for you’ll is to alter any found object and create a piece of altered art.

march-challenge-rbc


Challenge Guidelines:

  • Create any altered art project.
  • Use only found objects to alter (at home/office/scraps) and not new resources like MDF bases.
  • Use any technique.
  • Use any form of butterfly in your project. (stamped, die cut, fussy cut, 3 D sticker, anything, we want to see at least one butterfly )
  • This challenge is open till 31st March, 2017.

General Guidelines:

  • Be a follower of our Blog
  • Like our Facebook page
  • Create a new project for the challenge and link it to our blog for the current challenge. No back links allowed. You could also link it up from your social media account in case you don’t have a blog.
  • Do mention the supplies used from our store and link them to our online store .
  • Link directly to the project you are submitting and not your blog.
  • Each participant is allowed upto 2 entries
  • You can use the same project to enter at a maximum of 3 challenges.
  • 1 winner and Top 5 picks will be selected. All chosen entries can grab the badge to flaunt on their blogs. The winner will receive a store voucher for 400/-.

Looking forward to your projects and good luck!

Here is some inspiration:

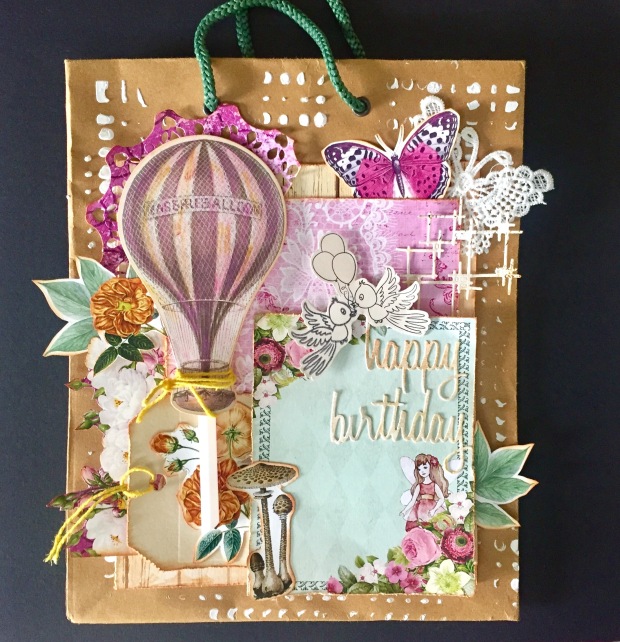
We altered a paper bag into a birthday gift bag. We’ve used Fairy Land Collection from Papericious. Since we had birthday gift bag in mind, we used balloons and the sentiment. We have added texture with a stencil and texture paste, fussy cut and die cut elements, distressed with inks, stamped our image and layered all elements.

altered-paper-bag


This project is submitted for:

Papericious February Challenge

papericious-feb

Altered Eclectics  -March Challenge

Rhedds Creative Spirit– March Challenge